Streamer setup: go live with Krunc
The two-minute video above walks through the same five steps; captions are available.
Everything below happens in your workspace at https://krunc.com/dashboard. You need the owner or admin role. The same guide lives inside the dashboard at Go-live setup, with pictures of each screen and a checklist that ticks itself as you complete the steps.
Step 1 — Set up each channel once
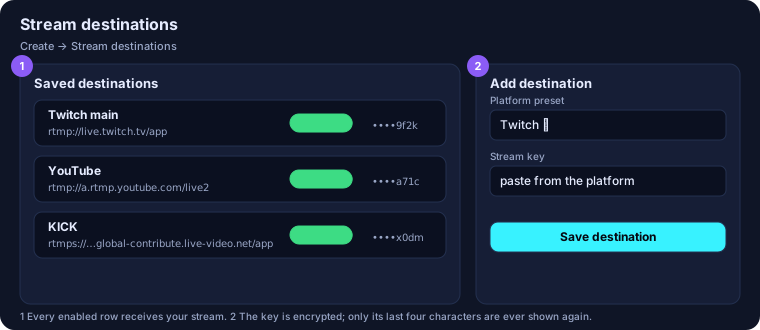
- Open Channels (Create → Channels). Every platform is one card with two halves: the account and its stream key.
- Connect the account. That is what flips your live badge, counts live viewers for sponsors and publishes your scheduled posts.
- Add the stream key on the same card — or don't. On Twitch, YouTube and KICK there is nothing to paste: press Fetch key from … and Krunc reads the channel's own key through the connection you just made. Facebook, Instagram and TikTok have no API for stream keys, so copy those from the platform; the server URL is already filled in from the platform's own instructions. Keys are encrypted and never shown again in full.
If a card says Reconnect to fetch the key, that account was connected before Krunc asked the platform for permission to read it — reconnect once and the key fills itself in.
- Leave each destination enabled. Whatever is enabled gets your stream.
- Press Test all keys. Krunc sends two seconds of black video to each platform and tells you which keys were accepted — a minute now beats finding out mid-stream. A key that was rotated on the platform shows up as not accepted.
Stream keys need the admin role; staff can connect accounts but never see a key.
Step 2 — Turn on sponsors (optional but recommended)
- Make sure Twitch, YouTube or KICK is connected on Channels — sponsor impressions are counted against a real live viewer count.
- Sponsors → enable sponsorships on your profile and accept the campaigns you want to run. Without this, no overlay is shown anywhere.
Step 2.5 — Name your stream once
On Go live, Krunc ingest or OBS setup there is a Stream title card. Type the title and the game
once and press Save & push now: Krunc sets them on Twitch and KICK (title and category) and on YouTube
(title — YouTube takes no game from us). Leave Push it automatically when I go live on and it happens every
time you start a stream, so you never open three dashboards again.
If a platform says reconnect needed, it was connected before Krunc asked for permission to set the title —
reconnect it once on Channels.
Step 3 — Pick how you go live
Option A — OBS on your PC (best quality)
- Install OBS 28 or newer.
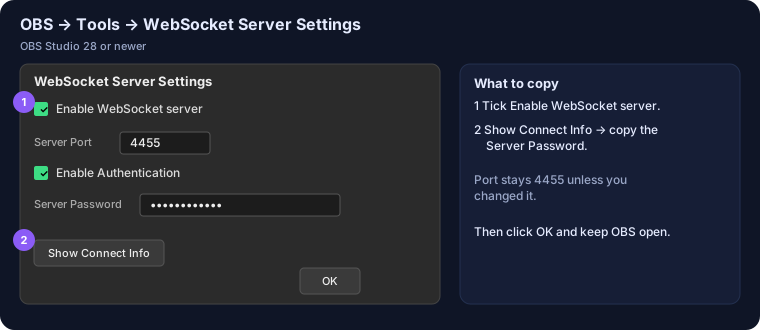
- In OBS: Tools → WebSocket Server Settings → tick Enable WebSocket server → Show Connect Info → copy the password.
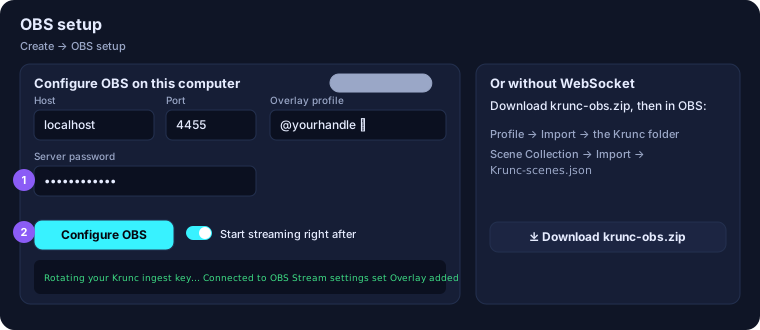
- In Krunc: OBS setup (Create → OBS setup) → paste the password → Configure OBS.
Krunc sets your stream server and key inside OBS and adds the sponsor overlay as a browser source. Tick Start streaming right after if you want to go live immediately.
- Add your game capture, camera and mic above the overlay source in the scene. Press Start Streaming whenever you like. One stream leaves your PC; Krunc sends it to every enabled destination.
No WebSocket? Click Download krunc-obs.zip on the same page, then in OBS use Profile → Import (the Krunc folder) and Scene Collection → Import (Krunc-scenes.json).
Setting up a second computer is fine — both get the same key, and neither stops the other working. If you lose the key, Krunc ingest can reveal it again; rotating it is only for when it leaks (and then every computer needs setting up again).
Option B — No software: go live from the browser
- Open Go live (browser) (Create → Go live).
- Click Share screen (tick share audio in the Chrome dialog if you want game sound) or Camera.
- Choose a quality (720p is the safe default; your upload should be at least 1.5× the bitrate) and press Go live.
- Keep the tab open. Stop or closing the tab ends the stream.
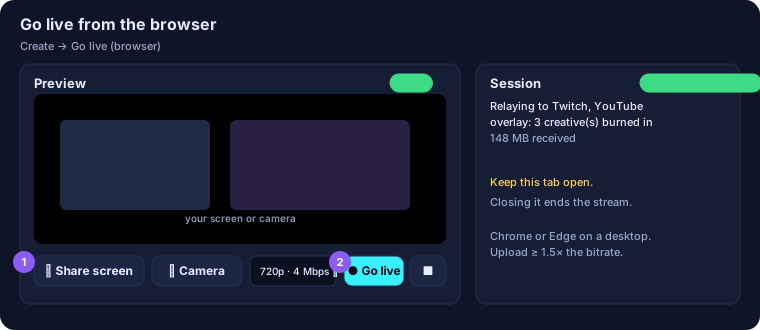
Chrome or Edge on a desktop works best.
Option C — From your phone (IRL, events, no computer)
Krunc ingest takes RTMP from anything, so a phone behaves exactly like OBS: the relay sends it on to every
enabled destination and the sponsor overlay still applies.
- Install Larix Broadcaster — free, iOS and Android.
- On Krunc ingest, press Show setup QR and point the phone's camera at it. Larix opens with the
connection already filled in, so there is no 35-character key to type on a touchscreen.
- Pick that connection in Larix and press record. The ingest page shows LIVE ON INGEST within a minute.
Any app that accepts a custom RTMP server works as well — give it the single URL from the same panel, or the
server and key separately. On mobile data, 720p at 2500–3500 kbps holds up better than 1080p; the relay does not
re-encode, so whatever the phone sends is what each platform gets.
The QR and the single URL both contain your stream key. Treat them like a password, and keep the QR off stream.
Step 4 — Sponsor overlay: pick one of two ways

- In OBS (Option A) the overlay is a browser source Krunc already added. Nothing else to do.
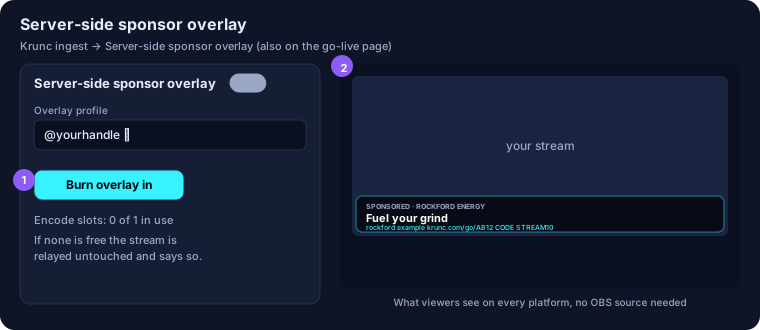
- Burned in by the server works for both options: on Krunc ingest or the go-live page, choose your profile and click Burn overlay in. The server draws each sponsor creative into the picture on the campaign's schedule and re-encodes at 720p. The server can do this for one stream at a time; if the slot is busy, your stream still goes out, just without the burned-in overlay, and the sessions table says so.
Step 5 — Check it worked
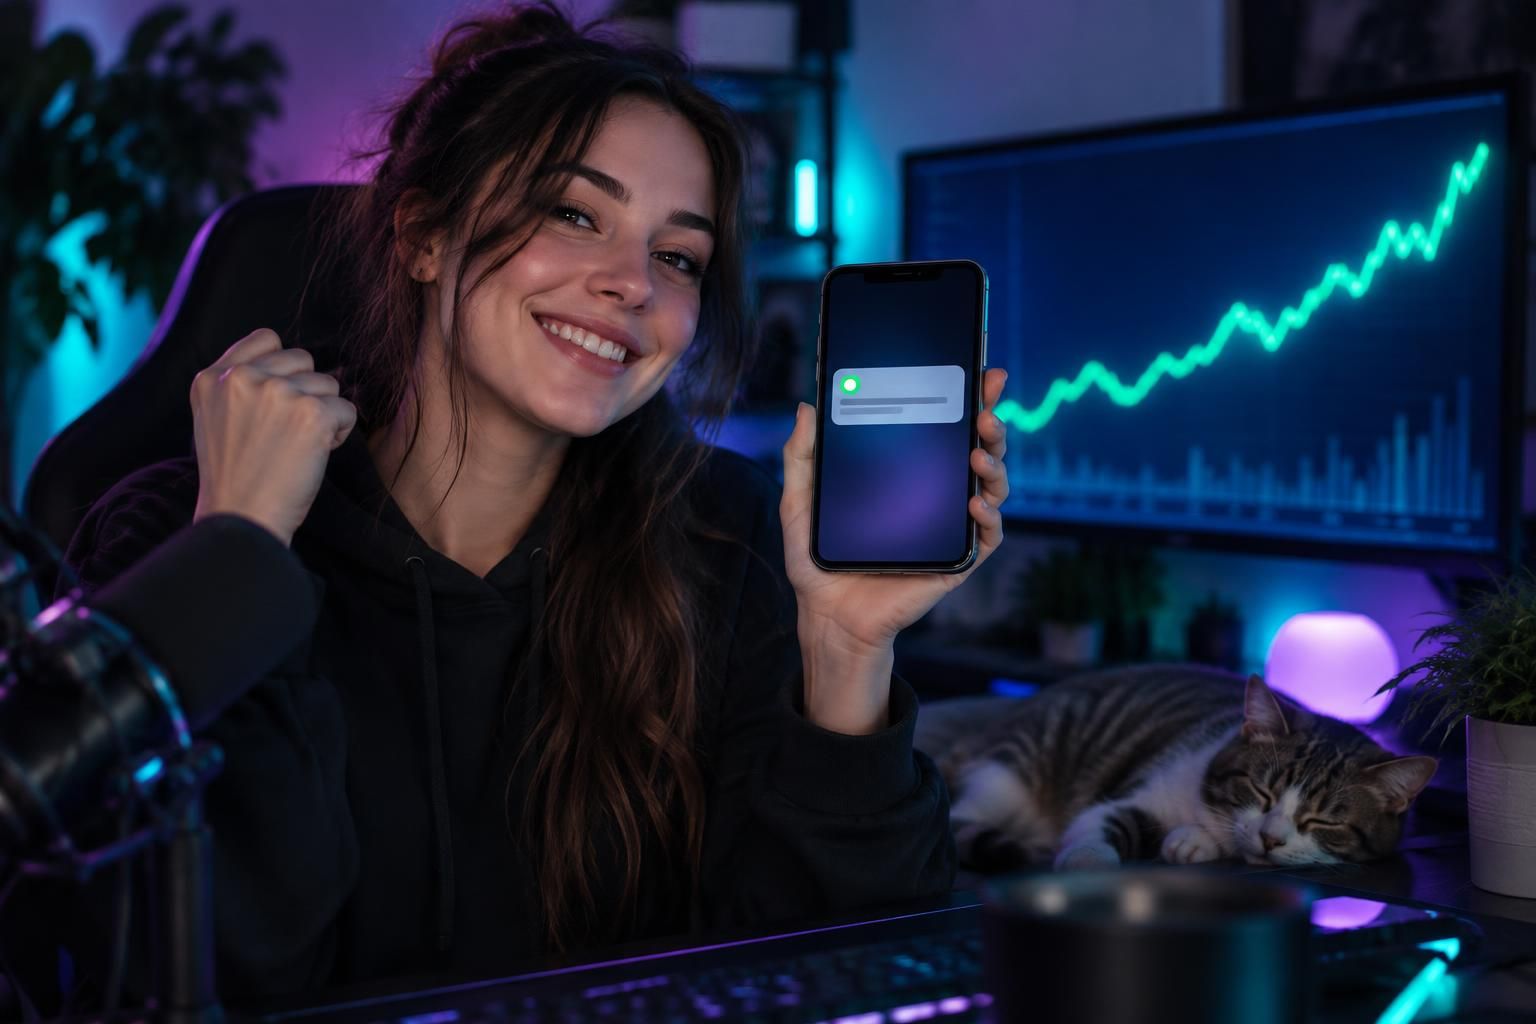
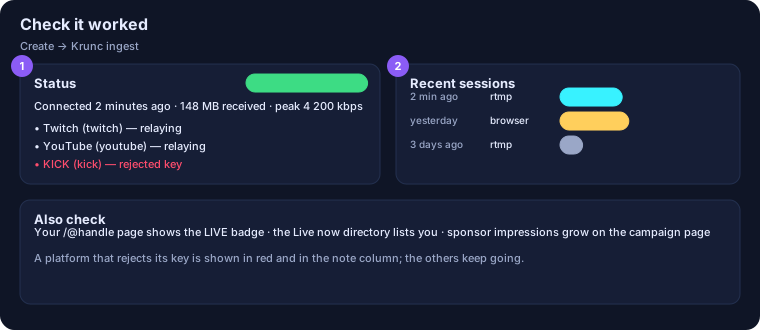
- Krunc ingest shows LIVE ON INGEST within a minute and the destinations it is relaying to. A platform that refuses the stream is marked not receiving there with the reason, and you get a notification while you are still live — the other platforms keep streaming.
- Your /@handle page shows the live badge; the Live now directory lists you.
- Sponsor impressions appear on the campaign pages as the overlay airs.
If something is off
| Symptom | Check |
|---|---|
| OBS setup says connection refused | WebSocket server enabled in OBS, port 4455, password correct |
| Browser go-live never reaches Live | Upload speed; a firewall blocking UDP 8189 to the Krunc server; try 480p |
| A key was accepted last week but not today | It was rotated or revoked on the platform. Fetch or paste it again, then Test key |
| A platform is missing from the relay | That destination is disabled, or its key is wrong. Krunc notices during the stream: you get a notification, and the ingest page marks the platform not receiving with the reason. Input/output error means the platform rejected the key — fetch or paste it again on its Channels card |
| No overlay on stream | Sponsorships enabled on the profile and at least one accepted, active campaign with an approved creative |
Questions: use the contact page and pick Support.